If you are visiting my site, please stay and have a look around. If you would like to see some of the great creations the other ladies have made, start at the beginning of the hop at Terri's blog.
Here is a list of participants if you get lost along the way.
1) Terri Sproul
2) Chris Hurley
3) Amanda Marks
4) Debbie Buckland
5) Brenda Lee Burfeind
6) Yolonda Anthony
7) Katie
8) Debbie Feist
Now on to my project. I want to show you how I used the Gypsy to design my card.
I was lucky to be one of the beta testers for the Imagine App on the Gypsy. Since this is only a beta test, I don't know what the finished product will actually look like.
The opening screen on the Gypsy now shows an Imagine Icon.
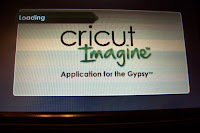
The Imagine application is opening up.
You will have several choices once you reach this screen.
Today I am using the print & cut feature.
Here you will choose which cartridge you want to use.
This is the normal view of the images.
I chose to use the keypad view.
I picked the poinsettia flower pot.
I printed and cut the flower pot as a whole image and
I also separated the layers. I used two of the flower cuts so
could give the image more dimension. They were cut at 4 inches.
I also cut a piece of the pattern paper using real dial size at 5 inches.
After checking that all of the settings are correct,
you are ready to print and cut your image.
I placed the paper in the Imagine and pressed "GO"
This card is a standard A2 size card (4.25 x 5.5). I placed the solid die cut on the mat. I then used the die cuts that were cut into layers and mounted them on top of the solid die cut to give it dimension. I also used extra cuts of the flower for even more dimension. As you can see, I went a little crazy with the stickles. It sure made it one sparkly card.
Recipe:
Bazzil White Cardstock
Imagine Cartridge - Snow Angels
Foam Tape
Stickles - Star Dust, Yellow, Warm Lipstick, Fruit Punch, Burgundy, Aqua
Distress Ink - Peeled Paint, Spiced Marmalade, Broken China
Now on to Katie's blog.


I love it... great job
ReplyDeletemaria
Beautiful. Thanks for the great tutorial also. I wondered what the gypsy was like.
ReplyDeleteSmiles Sher
Great tutorial and beautiful card!!
ReplyDeleteAwesome tutorial. I just love all the flowers.
ReplyDeleteGorgeous, and more blue. LOL. Love the flowers
ReplyDeleteI love your card. It's too cute. TFS!
ReplyDeleteChristel (Scrappin' Sista)
http://onescrappinsista.blogstpo.com
askscrappinsista (at) hotmail (dot) com
one can NEVER have too much sparkle!
ReplyDeletelove this card. very creative
great card and nice tutorial :)
ReplyDeleteStunning Yolanda!!! Oh, and never ever is there to much bling/sparkle. TFS
ReplyDeleteI love your post for several reasons. I found your tutorial on the gypsy great, and your card is beautiful. I love the dimension and all the sparkle!!
ReplyDeleteHi there,
ReplyDeleteI need to get my gypsy to work with my imagine. Can you tell me how to do that? My gyspy doesn't have the imagine icon like yours does. Do I just need to sync with my computer and install updates or something? I'd appreciate your help with this!
Thanks ~ Amy Jo (follower)
amyjrockstar at gmail dot com (Please send me an email if you wouldn't mind). :0)